Sunday, 11 November 2012

Home Organization: Magnetic Meal Planning Board

Happy Remembrance Day!!

I am at home SO sick today, Have come down with a horrible cold. So, I'm sitting bed thinking that it would be a good time to blog...hahaha...since I have the time.

A number of you have been asking for me to blog about the Magnetic Menu Board I made this Summer. I haven't had a chance to sit down and talk about it so here it is:


I LOVE my magnetic board....It is SO helpful! I keep it in the kitchen. I don't meal plan for the whole month that gets a bit too crazy, I just do it week by week and place the magnets on. This was the one I did for September. 

This idea totally was NOT mine, I found this on pinterest. You can find it there and do the exact same thing, all the FREE printables are there. 

Here are the step by step directions on I made it:


1. Go on Pinterest and look up "Magnetic Menu Board" click on it and go to the site "The homes I have made" blog. **
2. Print the FREE printables (as above) 
3. Get the magnet sheets (I got mine at Dollarama for a $1 each) 
4. Cut out all the printables and stick them to the magnet sheets, then cut them out again with the magnetic backings....this is what takes a long time. I worked at it slowly over a couple of weeks. 
5. Buy the plastic binder these have page protectors already built in as you can see below. I got mine a yoyoya it's a big dollar store in Chinatown. 
6. Cut out the spine printables and stick them on. 
7. Organize your recipes according to the spine labels and make a magnet for each one. 
8. Organize your magnets in a bead box, some magnets with recipe names on and some without so you can write new ones too. (see picture below for example) I got this at the same dollar store as the binders.
9. Get a Magnetic Calendar board. (They have them all over, Walmart, Zellers, I've even seen them in Dollar Stores...I got mine at Staples for $15) 

**Once you are on Pinterest and you go to this lovely lady's blog..."The homes I have made" she gives lots of details on how to make it as well and goes more in depth. 

Here are the pics as mentioned above in the step by step directions:


Menu Magnets box: In here I have all the magnets some written on and some not, because I like trying new things, whiteboard pen, and baggie with extra cut outs that are not on magnet if I need to make more. 


Example of them being written on. 


This is a picture the binders that got from the big dollar store in Chinatown it is right inside International Village where the Starbucks is. They were a dollar each. 


This was a very cost effective project. Here is the breakdown of what I paid for this...I love saving money. 

6 folders (page protectors included) - $6.00 
Magnetic Calendar board (came with a dry erase pen) - $15.00 
Magnet Sheets - $10.00 
Organizational box - $3.00 
Printables - FREE 

Total for this project: $34.00 


Happy Menu Board Making...If you have any questions about it feel free to message me!! :) 


Love
Ashley 


Tuesday, 6 November 2012

In the air theres a feeling of.....CHRISTMAS!!!

Christmas........is coming!!

I'm getting excited because we are getting ready for Christmas! Bus Ministry Banquet planning, decorating, Christmas shopping.....


But, I want to talk about Christmas Shopping, here are some of the things that I do to plan for Christmas shopping, it is always a stressful thing, so I thought I'd share some of the tips/tricks that I use for Christmas shopping...

1. Go to the states!! The prices there are SO much cheaper and reduces tons of stress financially!

2. Stay in a hotel while you are in the states!! It is so nice after shopping for hours to come back, go in the hot tub and relax in your hotel room. We stay at the Holiday Inn Express they have the BEST prices (under $70 a night during november when we go), and it includes a buffet breakfast every morning, which is another thing we don't have to worry about. Also, then you are not rushing to get back through the border line ups, you have 2 days to shop and its not such a rush.

3. Plan before you go!! I use these great FREE printables that I got from Pinterest!! This step is SO important...I save so much time using these "worksheets" and having a plan. Before I would just wonder around not knowing what to get and it would waste tons of time. Some people I don't know and I wait to see what I can get when I'm down there as they have such great deals. Having the checklist helps though, to keep you on track. For those people I just write "see what they have".
Here are the links to the printables:


http://printables.yourway.net/holiday-printables/christmas-shopping-list/

http://printables.yourway.net/holiday-printables/christmas-order-tracking/

http://printables.yourway.net/holiday-printables/christmas-budget-worksheet/

http://www.ellinee.com/blog/wp-content/uploads/2011/12/giftplanner.pdf

These ones are not totally geared towards shopping, but....I LOVE them and use them all the time:

https://dl.dropbox.com/u/79252083/hhc2012blank.pdf

http://christmasplanner.com/free-printable-clean-mama-holiday-shortcuts-planner

4. Go to a gift wrapping centre!! I LOVE these! I go to the one at Guildford Mall after I'm home. Take your gifts for wrapping to the centre and they will wrap them all for you. It saves tons of time for you, not having to wrap everything AND it helps with charity all the money they make go to the charity that they are helping that year. Helps you and helps others...so great!!

5. Relax and have fun!! Think about the people you are buying for and how you can bless them. Take breaks, have Starbucks and go for lunch (this one is important...you need energy).

Happy Shopping Everyone!!

I would like to hear about what you do for your Christmas shopping too? What helps you?

<3 Ashley

Tuesday, 28 August 2012

Organization: Bathroom

Spent almost the WHOLE day organizing, purging, and cleaning the bathroom. So I thought I'd Blog about it. :)  

***Please excuse some of the mess there is no paint on the walls and there is dust every were we are right in the middle of doing home renos. :P *** 

Here's what I did: 

I coupon, so I have a little stockpile when it comes to toiletries. I don't go too overboard having a BIG stockpile because I don't have a huge bathroom or a huge room to make a stockpile. So I bought cute little plastic drawers and covered the front with Scrapbooking paper --It gives it a nice look. I got the drawers at Walmart for $19. 

On the top is a white basket (thank you Lisa Baker), where I keep bars of Dove soap I'm just out right now and my body lotion - LOVE this lotion it's so amazing has no greasy or sticky feel at all! 


The first drawer is Dental Care: 

This is were I keep toothpaste, whitestrips, dental floss etc. 

Second drawer is Soap: 

This is were I would keep the extra Dove bars and shower gels, I also have two small travel sized ones in the back for when I go away. 

The third drawer is Facial products: 

This is were I have eye make-up remover, face masks, and cleansers.

The fourth drawer is nail care:  


This is were I have nail polish (I have them in a portable container because I take them places often, such as when we have a preteen girls event etc. It's easy then to just grab and go) as well as nail polish remover, remover pads, cuticle oil, nail files, nail clipper, buffers etc. 

The fifth drawer is Bath stuff: 

I LOVE LOVE LOVE Lush!! <3 This is were I keep bath bombs, salts, bubble bath, etc. 

The sixth drawer is personal care: 

This is were I keep deodorant, shaving cream, razors, razor blades etc. 

Then the last drawer is paper products: 

This is were I keep eye make-up remover pads, cotton swabs/Q-tips, cosmetic wedges, and cotton balls. 

That is my STOCKPILE drawer!! :D 


The other things I did to organize are the toilet paper rolls, towels, and hair care! Here's what I did: 

I got this drawer at Superstore I think it was around $10 or so. On top I have a basket (from Lisa also, Thank you :D) - Please excuse some of the mess there is no paint on the walls and there is dust every were we are right in the middle of doing home renos. :P 

In the basket, I keep hair care products. My blow dryer, Hair brush for after the shower - I use a comb the rest of the time I only use the brush when my hair is wet., extra shower cap, travel blow dryer - that's in the zebra print case it's for when I go away or need to dry my hair at the gym etc., then in the front is my leave-in conditioner, mousse,  split end mender, and treatment bags/caps. 

The top drawer is for toilet paper rolls and the bottom drawer is for bath towels - they are in the wash at the moment....LOL! :P 

Then the last thing I did today was organize some of the products in my bedroom, I know it doesn't go along with bathroom organization but thought it kind of went together since it's dealing with toiletries. Here it is:

This is my night stand, here I have a small basket that I got from Bath and Body Works for $5. I have in there Vaseline lotion which I put on my face before bed - it is SO good, I have used expensive name brand cream and honestly this lotion is just as good and less then half the cost., lip treatment/ointment, foot cream, and my water bottle. Then I usually have a magazine or book that I'm reading. Right now I have the IKEA catalogue as we are in mist of doing home renovations. 

and... on the dresser 
Glasses area...I have a microfibre cloth with the lens cleaner and then the glasses case next to it. 

Then I have another basket which is also from Bath and Body Works, that's were I have purfume, hairspray, face primer etc. 

and.............that is it................my day of Organizing!!! 


Monday, 6 August 2012

Organization: Home Organization Binder!!

Yay!! Finally getting around to blogging about this!! I'm really excited about this post, because I LOVE this binder! It has been SO helpful and has really changed my life...no joke!

I have taken TONS of pictures, it seems to be the easiest way to show you how I organized it! It took me about 2 months to complete. I would work on it a bit every evening looking online for FREE printables (thanks Pinterest, and Shawna for your awesome blog!!), printing stuff, filling it in, rearranging it to work for me etc.

I was able to do this binder completely FREE!!! Other than buying the binder, tabs, stickers, and plastic folder inserts from Martha Stewart Home Office collection from Staples!! (Which I am SO in love with. I love this stuff from Martha Stewart so pretty and functional, and it's not overly priced!! Bonus!!)

So.....Here it is:


In the front there is a plastic zipper folder with colour coding stickers, pens and really cute post-it notes! 

Next, 


is my "Peek at the Week"and "Time Management"schedules!! I LOVE these!! 

Then, 


is "Monthly Calendar" and "Daily to do lists"! I am plan to get the Martha Stewart Monthly Calendar inserts but they don't carry them in Canada :( We are going to the US for summer vacation so going to pick them up when I'm there, but for now I have printed these calendars off from online! They are from Mrs. January! :) ~~ Check my Pinteret board for the link!  

Then,


the "Important info" Section! In this tab there is emergency contact info, home related phone #'s, family contact info, birthdays and anniversaries, home inventory list etc. 

Then, Meal Planning.....    (this is a BIG section so I will break it down) 


First, is the weekly meal plan sheet which I fill in every Monday, then I've inserted these cute little plastic recipe holders from Martha Stewart Home Office. If there is a new recipe to try for that week I put it in there, that way everything is together!! Then is the grocery list (I love this grocery list printable...thanks Shawna for posting the link on your blog :D) it is so easy you just have check off what you need, take it out of your binder and go to the store! No need to write everything out!! LOVE simplicity!! 
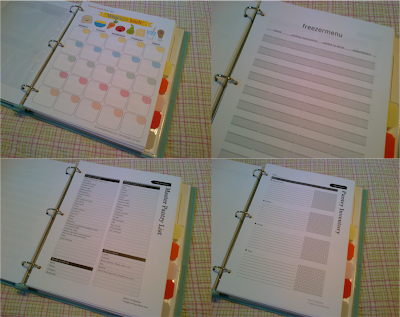


Still in the meal planning section....comes the "What's for Lunch" printable this is were I write out what i'm going to pack for lunch each day! You can plan it for the month but I usually just do week by week! Whatever works for you!! Then is the "Freezer Menu" printable to write down what freezer meals are in freezer and when they should be used by...this is SO helpful if you do a Big Cook which I sometimes do, it saves SO much time!! Then the "Pantry Inventory" lists...I love these too because it helps a lot when grocery shopping so you don't double up on stuff...I have seriously saved A LOT of money already by doing this!! I just gave some of these pages to my grandma too who is now using them and is SO loving it!! Helpful stuff!! :D 
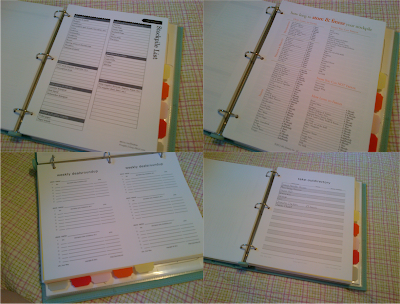

Lastly in the meal planning section, is my "Stock Pile" list...same thing as the pantry lists but for soaps, toilet paper etc. again SO helpful and I have saved A LOT of money by using these printables!! There are two printables in here on "how long to store and freeze your stockpile" and a "Canada in season produce guide"...I love the produce guide helps me to know when things are cheapest to buy and when they are the freshest! Then comes the "Weekly Deals Round Up" which is where you write down where the sales are that week, like at which grocery store, produce market etc. for that week! I coupon a lot so this is really helpful for me!! Lastly, "Take Out Directory" this is where I write down where we order take out from, phone #, hours etc. 

Next is the Home Management/Housekeeping tab..... 


This is where I have the "Weekly Cleaning checklists", "Home Maintenance Log" to write down when you had work done on appliances in your home, and "Utilities Tracker". Also, in this section even though it's not home management but I have the "Car Maintenance" stuff, when you should check your car during certain season, and to log when you had something done to your car like to track your last oil change etc. 


Then.....CHRISTMAS!!! I didn't take a picture of this one. This section has a "Holiday Shortcut Checklist", "Christmas Budget Worksheet", "Gift Idea's List", "Christmas Shopping List", "Order Tracking Worksheet", "Decor Inventory/Checklist", "Baking and Recipe Planner"...for when you plan to make something to bring to a potluck. Lastly a "Christmas Card Worksheet" to plan out sending your cards, shopping list for stamps, cards, etc. 
I don't have to much to say about this section yet because I haven't used it, but I'm sure it will be SO helpful come Christmas time! I was so disorganized last year and had lists and papers everywhere! I'm really pumped to use the "Order Tracking form" I order a lot of stuff from catalogues and online during Christmas so that will be helpful! Last year I had papers everywhere with conformation numbers etc.! 

Next is my FAVOURITE one!!!! Fitness!!! 


I'm a member at "She's Fit" LOVE this gym and on a program called "Healthy Transformations" which was recommended by my Physio and doctor. They include personal training which I needed for my neck and back and nutrition all for $20 a month...such great value and they are SOO good!! They have registered dieticians that work with you and personal trainers! I love my trainer she is SO helpful!! So, in this section I have my "workout card", "stretches", "at-home workouts" for when you can't get to the gym, info from a "No more excuses" workshop that I went to. "Sticker Charts", "She's Fit" monthly newsletters, and then "a note from the trainer"! I just keep it in the back! 

Then comes the "Medical/Wellness" Section
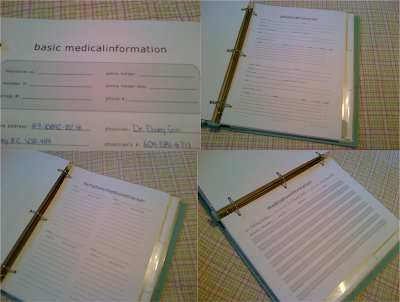

This section is where I have "Physician Records", "Medicine/Vitamin tracker" to track symptoms etc., "Basic Medical Information", "Doctor Tracker"...this is for when you visit the Chiropractor for example, you can write down when you went, what they did, how much was paid, and receipt # this is helpful because I have to submit this info to our extended health provider! LOVE this page! Then the last thing in the section is the stretches that the Physio gave me to do 2-3 times a day for my neck and back. I was involved in CrossFit about a year ago which is an intense exercise program even more than Bootcamp...I was crazy!! :P I was loving it and doing it 4 times a week but started getting a lot of pain thats when the Doctor referred me to Physio. It was too intense and I completely wrecked my neck!! It was horrible! This is why I am doing "She's Fit" with a personal trainer. They said I need to take it easy on exercise and work with a professional not go on my own or I could do more damage!

Then Lastly!! Yay!! I'm getting tired typing...LOL!! The "Budget" Section 
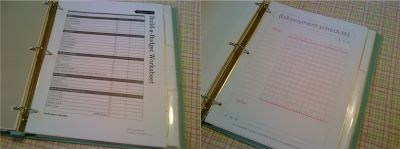

I didn't take a picture of everything here because there is personal info, so I will just make a list of what is in this last section of the binder. I have "Build a Budget Worksheet"...this is where you write out your full budget, then "Financial Goals Worksheet", "Bill payment Schedule" this printable you write out all the bills you need to pay then check it off each month when they were paid so you know you did and write down how much it was if you like. Then "Account tracker", "Wallet Contents" I love this one in cause your wallet was to get stolen then all thee #'s for costumer service, card #'s are right there!! and then lastly "Healthcare costs" to keep track of how much you spent on Vitamins/Supplements/Medication!! Then I have plastic folder with my "budget envelopes" which were found on Pinterest!! Just print and assemble they are really cute and you just write on what each envelope is for...ex. "Groceries". 

....................That is it........................my Home Organization Binder!!........


So to recap...here is a list of my sections, and where to find the printables!! 

Sections

Front: Schedules 
Calendar and Daily to do's 
Important Info/Emergency Info 
 Meal Planning 
Home Management/Housekeeping 
Holidays/Christmas 
Fitness and Health
Medical/Wellness 
Budget/Finances 

Each one of these is coloured coded by the order of the Martha Stewart Tabs! I have the colours memorized so thats how I flip to that section easily! (ex. Meal planning that's the green tab) 


Where do I find the FREE printables? 

ALL of these printables are on my Pinterest account under the "home organization binder" board! 

If there is a certain printable you can find, please e-mail me or Facebook message me and I am more than happy to help!!! :D 


Well...that's it....Thanks for reading my ridiculously LONG post!! hahahahaha!! 

Enjoy making your binders!! 


Saturday, 28 July 2012

Recipe: Magical Muffins

This will be a very short blog post today!! :D

So I've started a program with the gym I'm with "She's Fit" "Healthy Transformations" nutrition and workout program. They have some amazing muffin recipes on the eating program they are called "Magical Muffins"!

Thought I would share one of the recipes with you! So each to just take with you and go in the morning. Simplicity LOVE it!!

Here is the recipe:  (Enjoy)


Chocolate Coconut Muffins:
¼ tsp baking soda
2 tsp Splenda (optional)
2 ½ tsp protein powder, chocolate
½ cup oatmeal, ground

2 Tbls coconut, slivered
1 tsp cocoa, unsweetened

1 tsp all bran, ground


Friday, 6 July 2012

Organization: Summer Projects!!

Happy Friday!! :D

I have been working on a few different organizational projects this summer. Some I've almost completed and are testing out/praciting for September! Come September things will be VERY different for me and a little busy! So, I am working on getting things organized now to avoid stress later! hahaha!


The first project I've been working on and is ALMOST done!! YAY! Is the "Home Organizational Binder" I've been using the Martha Stewart Home Organizational Supplies from Staples and are so in love with them!! SO SO cute and practical!! (This makes me excited) I have used TONS of online printables to create this binder on the inside, but have managed to do it completley FREE other than buy the Martha Stewart stuff.


The Second one, is a "Mail Command Centre" I came across this on Pinterest (and who doesn't love pinterest... :P). Basically it is a file box with folders. Label each folder according to what you need. Mine are: Outgoing Mail, Incoming Mail, Bills to pay, Magazines, Take out menus and Coupons (only the ones that I put in my "organizational binder" or "coupon binder") and then one file for each person in the home. (this is where they can put something that comes for them, that they want to refer to. ex. Church notices, or if you have kids school notices etc. The file lables I got off a great blog and are super cute and were totally free!! :) I will give you the link later on!


The Last one, is a "Magnetic Menu Board" System! This one is SO cool and I think the one that I'm the most excited about! I have meal planner pages in my home organizational binder which I will use as well for the details of each meal. However, this is so easy to follow and then you know excatly what you're doing! This Summer I have joined  "Healthy Transformations" Meal program and Personal Training!! I have been having some minor health isssues, neck injury, stomach problems, stress realated stuff, and really low iron. So as I was seeing all these doctors and Physiotheripists (which on a sidenote was totally crazy...I really don't like the health care system and despise going on multipule medications...my little rant for today.) they refered me a personal trainer for my neck and to see a registerd dietician. This "Healthy Transformations" program provides me with both a personal trainer and a dietician for only $40 a month! PTL! To get to the main point...LOL, This menu board will be SO helpful because I can only eat what they tell me. It is a year plan that I am on so I can make magnets for all the recipes and then just simply place them on for the month! :)


I will be sure to post about all these projects once they are complete and will give you the links to the websites that I used. Like the Home Organizational Binder printables, Mail Tabs, and Magnetic menu board printables! :)


Thursday, 28 June 2012

Organization: Work/Ministry Organization Binder

Hey Guys!!

I hope you are all having a great week! Today I've decided to show you and tell you about my Organizational Binder that I use for Work/Ministry. I have a lot of diffrent things that i'm involved in, so over time I was getting SO overwelmed on how to keep everything that I needed to do each week organized. I tried EVERY planner, agenda, palm piolet (totally old school :P), Blackberry planner etc. (the list really does go on...hahaha). I have finally found that this is what works for me, it took a long time to created it and change it along the way. So here it is:


So to start with I have these AMAZING printables that I use...I LOVE LOVE LOVE them!! It's called "A peek at the Week" and then the time schedule SO good!! So, for the "Peek at the Week" I always print off the amount I will need for each month. I write the "Dates/Numbers" on each of the "weekdays" and then the fill in the "week of:" part. I do all this at the begining of the month. Then it's always ready to go when some one calls to schedule an apt. or organize a meeting etc. For the "to do" section I only write the most pressing/important tasks that I need to do in the week...NOT everything. I have other pages for that which I will get to. In the "to eat" section I will usually write in what i'm going to pack for lunch each day (I do this on Mondays, it's my day off and also my shopping day). In the "to buy" section I use that to write things that I need to get for Program's ASAP...the other shopping stuff goes in another section. These two pages you can find at www.iheartorganizing.blogspot.com <-- Amazing website guys!!


Then on to the tabs! I have coloured coded each program/area I am responisble for and have created a tab for each one. Behind each tab is the same thing for that specific area. (ie. ConnXion is pink)


 So, what's behind each tab....well here you go!! :P I have 3 sections under each tab that I divide with a coloured cardstock page. I took a picture of "The Wave" seciton. (on a side note, "The Wave" is the Sunday Morning Preteen Program that I do) so this is what I'll show you. I have 1st - a "To Do List" for that week as you can see on the top the circle it's in is Blue, that is the color I chose for "The Wave" area. 2nd - "Meeting Notes" this is where I will write down EVERYTHING when I have a meeting with ANYONE regarding that area. 3rd - "Shopping Lists" this is where I write down EVERYTHING that I need to get for that program/area for that week. There are no printables for these, I created them my self using "Word" and "Publisher"...they we're super easy to make.


Then lastly, I have a basic calendar. This is where I write the specific events going on...for example when "ConnXion" is "on" or "off" each week or  for "The Wave". I also, always include what the theme is for that week or promo. These printables came from: www.TheTomKatStudio.com and Red Stamp <--this one I just googled! :P (I love google)


And....So....this is it!! My Work/Ministry Organizational Binder!!! :)